Dynamic personalization
Table of Contents
Build dynamically personalized creatives
Personalized messaging is a core component of all modern marketing channels and a key driver of user engagement. Lob brings the power of personalization at scale to direct mail, enabling you to improve the performance of this key channel and improve your return on investment.
Lob makes this possible by supporting HTML creatives with merge variables. This empowers you to leverage your customer data to individually cater your messaging to each recipient in a way that will maximize the impact of a mail piece. You can now design your direct mail in an analogous process to email and other digital channels, leveraging dynamic personalization to drive successful and highly performative mail pieces and campaigns.
Some best practices that leverage dynamic personalization include:
- Capture 1-to-1 attribution: Use dynamic landing pages, QR codes, and unique URLs/promo codes to understand audience response at the individual level
- Repurpose digital campaign assets: Orchestrate an omnichannel campaign with cohesive messaging and branding through online and offline channels
- Experimentation: Easily execute A/B and multivariate tests by combining audience targeting with dynamic creation of multiple creative permutations. Test the efficacy of different images, layouts, CTA copy, promotions, and more.
- Integrate into the customer journey: Automatically send mail at any point in the customer journey by creating automated direct mail triggers at key actions and milestones
Below is an overview of how to leverage personalization within Lob in two parts: 1) HTML Templates and 2) Merge Variables.
HTML templates
Lob's HTML Templates support the inclusion of dynamic fields, called merge variables, which can be populated individually for each mail piece. These merge variables can be mapped to attribute values in your customer records or audience segments. For example, the value for your customer attribute "First Name" can be passed into a merge variable field in your creative called "Name" to dynamically include each recipient's own name in the content of the mail piece they receive. You can create and name your own merge variables within your template, giving you the flexibility to personalize nearly any aspect of your creative.
Creating a template
You can easily create, view, edit, and manage your HTML templates for any form factor by saving them within Lob's system.
NOTE: In Live mode, you can only have as many non-deleted templates as allotted in your current Print & Mail edition. There is no limit in Test mode.
HTML templates can be created within your Lob dashboard, or by sending HTML directly to Lob's Templates API endpoint. In order to create a template, you will need to include two pieces of information:
- An optional description
- The HTML for your template
While it is optional, we highly recommend adding a description so you can easily identify your template within Lob. As for the HTML design, you can start off with a pre-designed template from our gallery or follow these basic guidelines to get started. Templates are compatible with merge variables, which enable dynamic content. For more detailed guidelines and best practices around creating HTML designs, see our API documentation.
Both the description and your HTML can be edited after saving.
Like all Lob resources, you can create HTML Templates in both your Test and your Live Environment. Templates created in the Test Environment will only be available for postcards, self-mailers, letters, and checks created in the Test Environment, while templates created in the Live Environment will only be available for postcards, self-mailers, letters, and checks created in the Live Environment. Be sure to work closely with your developer to make sure you are working in the correct environment.
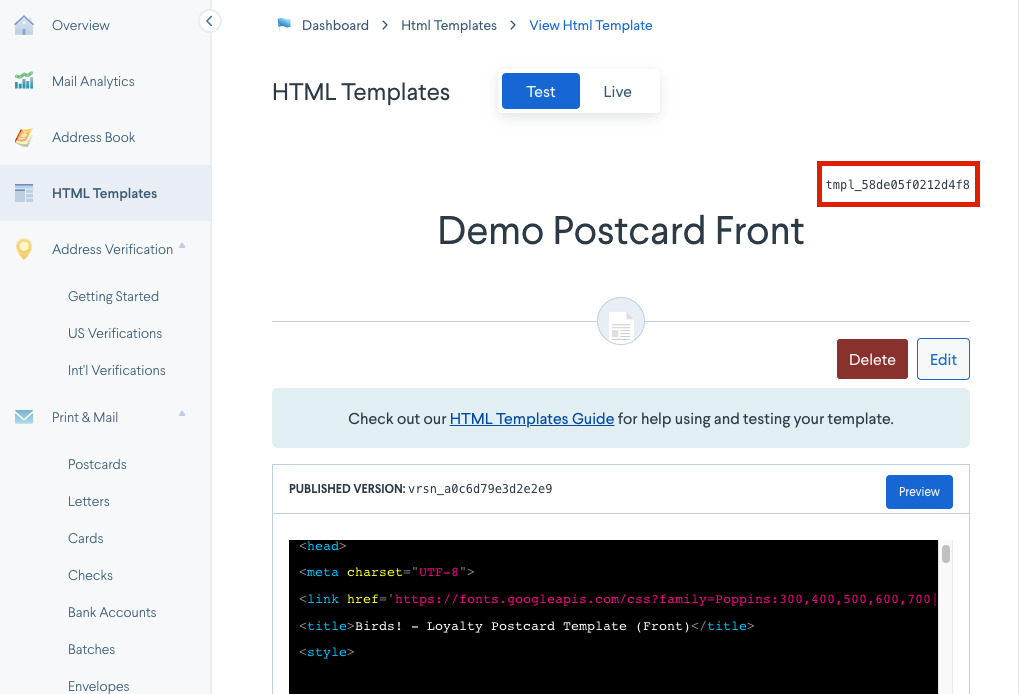
Viewing a template
Once you've created a template, you'll be able to view it on your Dashboard. On this page you can:
- Find the template's ID
- Preview the template
- Make edits to the template
- Delete the template
- View previous versions of the template
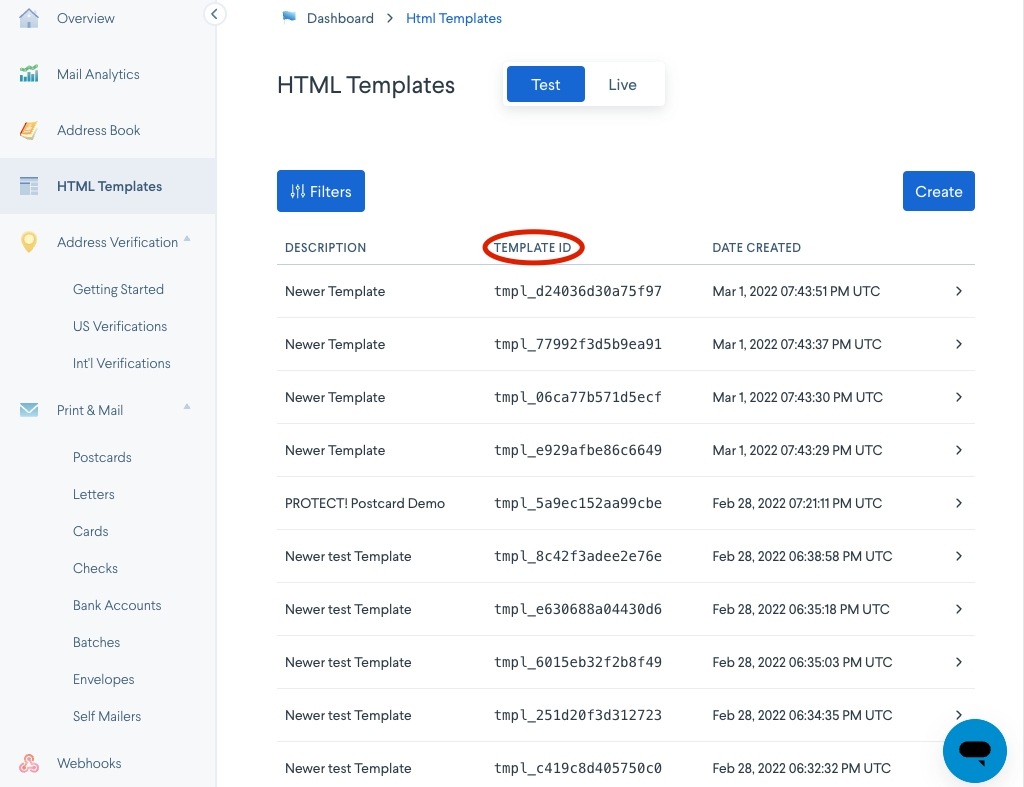
Finding a template's ID
At the top right-hand corner of the page is the Template ID, which is completely unique to this particular template. The Template ID is how you will refer to this template when creating a postcard, self-mailer, letter, or check.
Previewing a template
On this page, you can view the raw HTML for your template, as well as preview the design by clicking the "Preview" button.
When you preview a template, you'll first need to choose the format in which you want to preview it (Postcard, Letter, etc.). We will also auto-populate any merge variables we find in your template, which are dictated by {{double_curly_braces}}. After you've filled out these fields, you'll be able to preview your template as a PDF, which will open in a new tab (you may need to unblock pop-ups in the browser of your choice).
On the 2020-02-11 and later API versions, the JSON editor is required if you need to use loops, conditionals, or objects (more detail provided below). We will not auto-populate any merge variables we find in your template when using the JSON editor. See a postcard example below with two merge variables.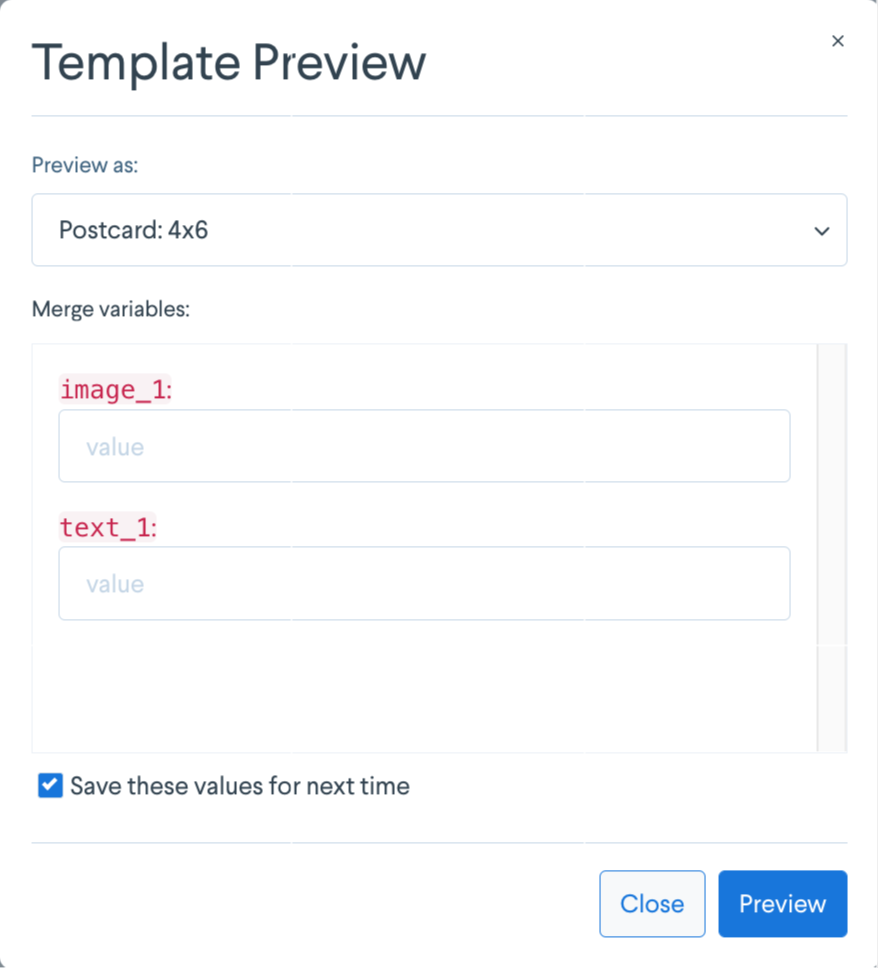
Keep in mind that you won't be able to see any specific proofing elements such as address information, barcodes, or cropping which occur when actually creating a mail piece. The best way to test these elements of your template will be to send it to yourself as a live mail piece.
Editing a template
You can edit a template's description as well as its HTML from the Dashboard as well. When you edit a template's HTML, a new published version of that template will be created. Those changes will go into effect immediately. Any subsequent postcard, self-mailer, letter, or check integrations referencing that template ID will reflect the updated changes as soon as they are submitted.
Deleting a template
If a template is no longer of use to you, you can delete it from Lob. Once you delete a template, it will no longer be usable for any postcard, self-mailer, letter, or check requests. Before deleting, ensure that the template is not being actively used in any integrations.
Template versions
The published version of a template will be the first version featured on the page. This is the version that will be used when that template is referenced in a mail piece request. Prior versions of the template can be viewed within the page, along with a unique ID and browser preview for each. This can be helpful for reconciling edits made in the past, or copying a prior template and saving it again in order to revert to it.
Using a template in a mail creation API request
To test and use your HTML template, you'll need to create a mail piece. For parameter details, see the respective documentation for each endpoint: postcards, self-mailers, letters, check.
For this example, we'll create a postcard. Don't forget to add merge variables to your HTML template for any dynamic fields. Also, remember that the published version of the template is the version that will be used for the request.
curl https://api.lob.com/v1/postcards \
  -u test_0dc8d51e0acffcb1880e0f19c79b2f5b0cc: \
  -d "description=Demo Postcard job" \
  -d "to=adr_78c304d54912c502" \
  -d "from=adr_61a0865c8c573139" \
  --data-urlencode "front=tmpl_d2ef51761865901" \
  --data-urlencode "back=tmpl_7c9c41753dfea20" \
  -d "merge_variables[name]=Harry" \
  -d "merge_variables[code]=5dks92"
After sending this request, you'll be able to see your final postcard design: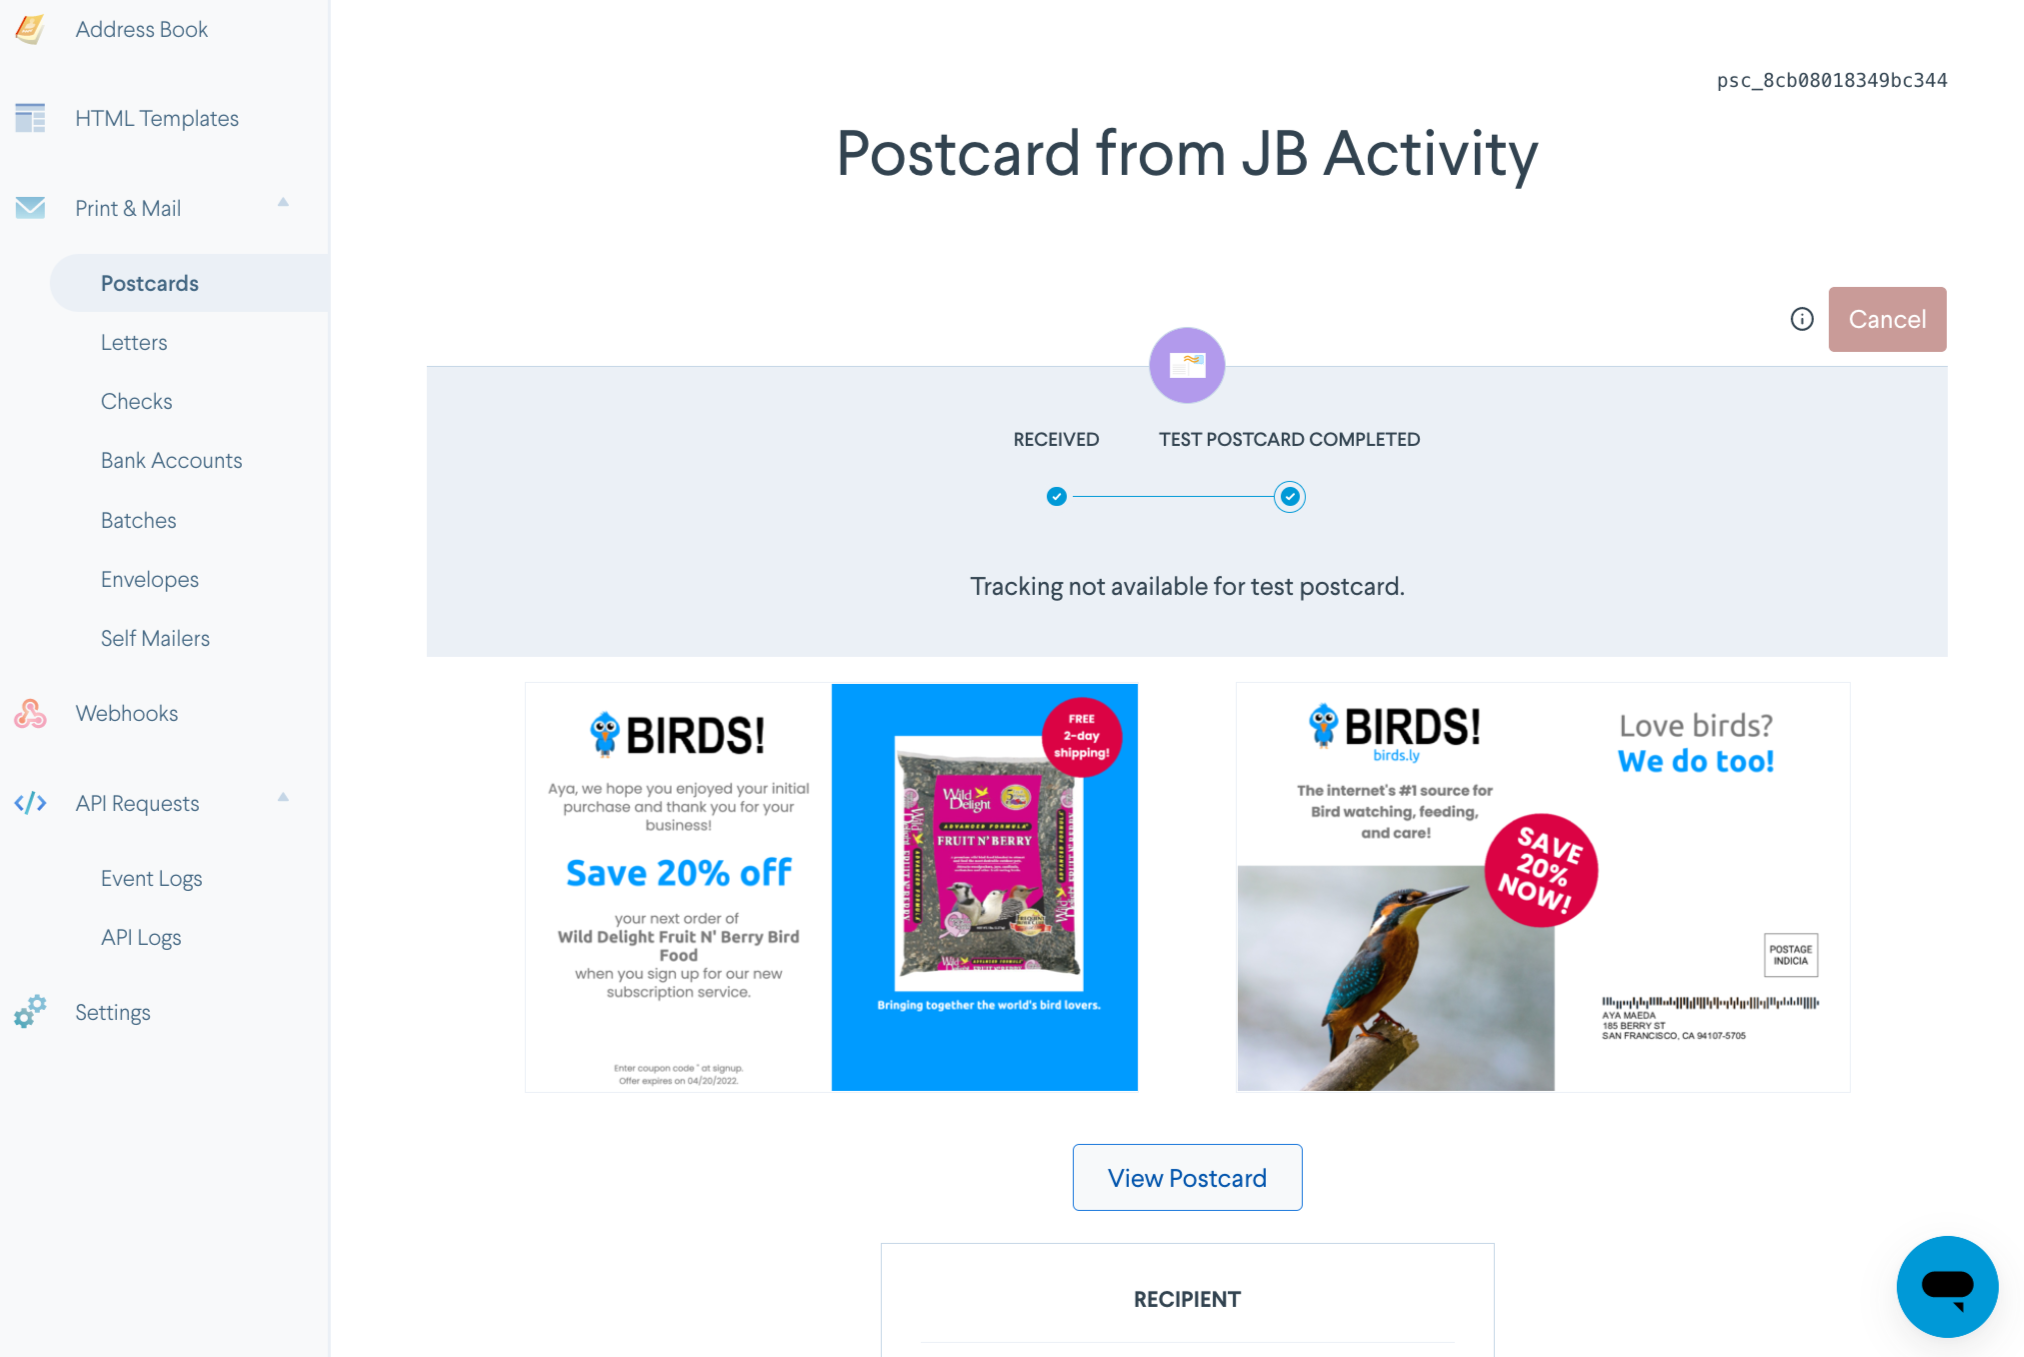
For any mail piece that use templates, the Template IDs and Version IDs used will be retrievable from the API (see the respective documentation for each endpoint: postcards, self-mailers, letters, checks), as well as viewable on the dashboard:
Using HTML and merge variables
Merge variables make it easy to personalize your mail pieces with whatever custom information you'd like to include. Common use cases for merge variables include:
- Personalized customer information (name, city, etc)
- Date
- Invoice line items
- Custom images
Usage
Merge variables only work if you use HTML to generate your mail piece. To make use of a merge variable, insert {{tag_name}} (with double curly braces) into the HTML template. You can define the merge variable name, and you can enter it into any section of your HTML.
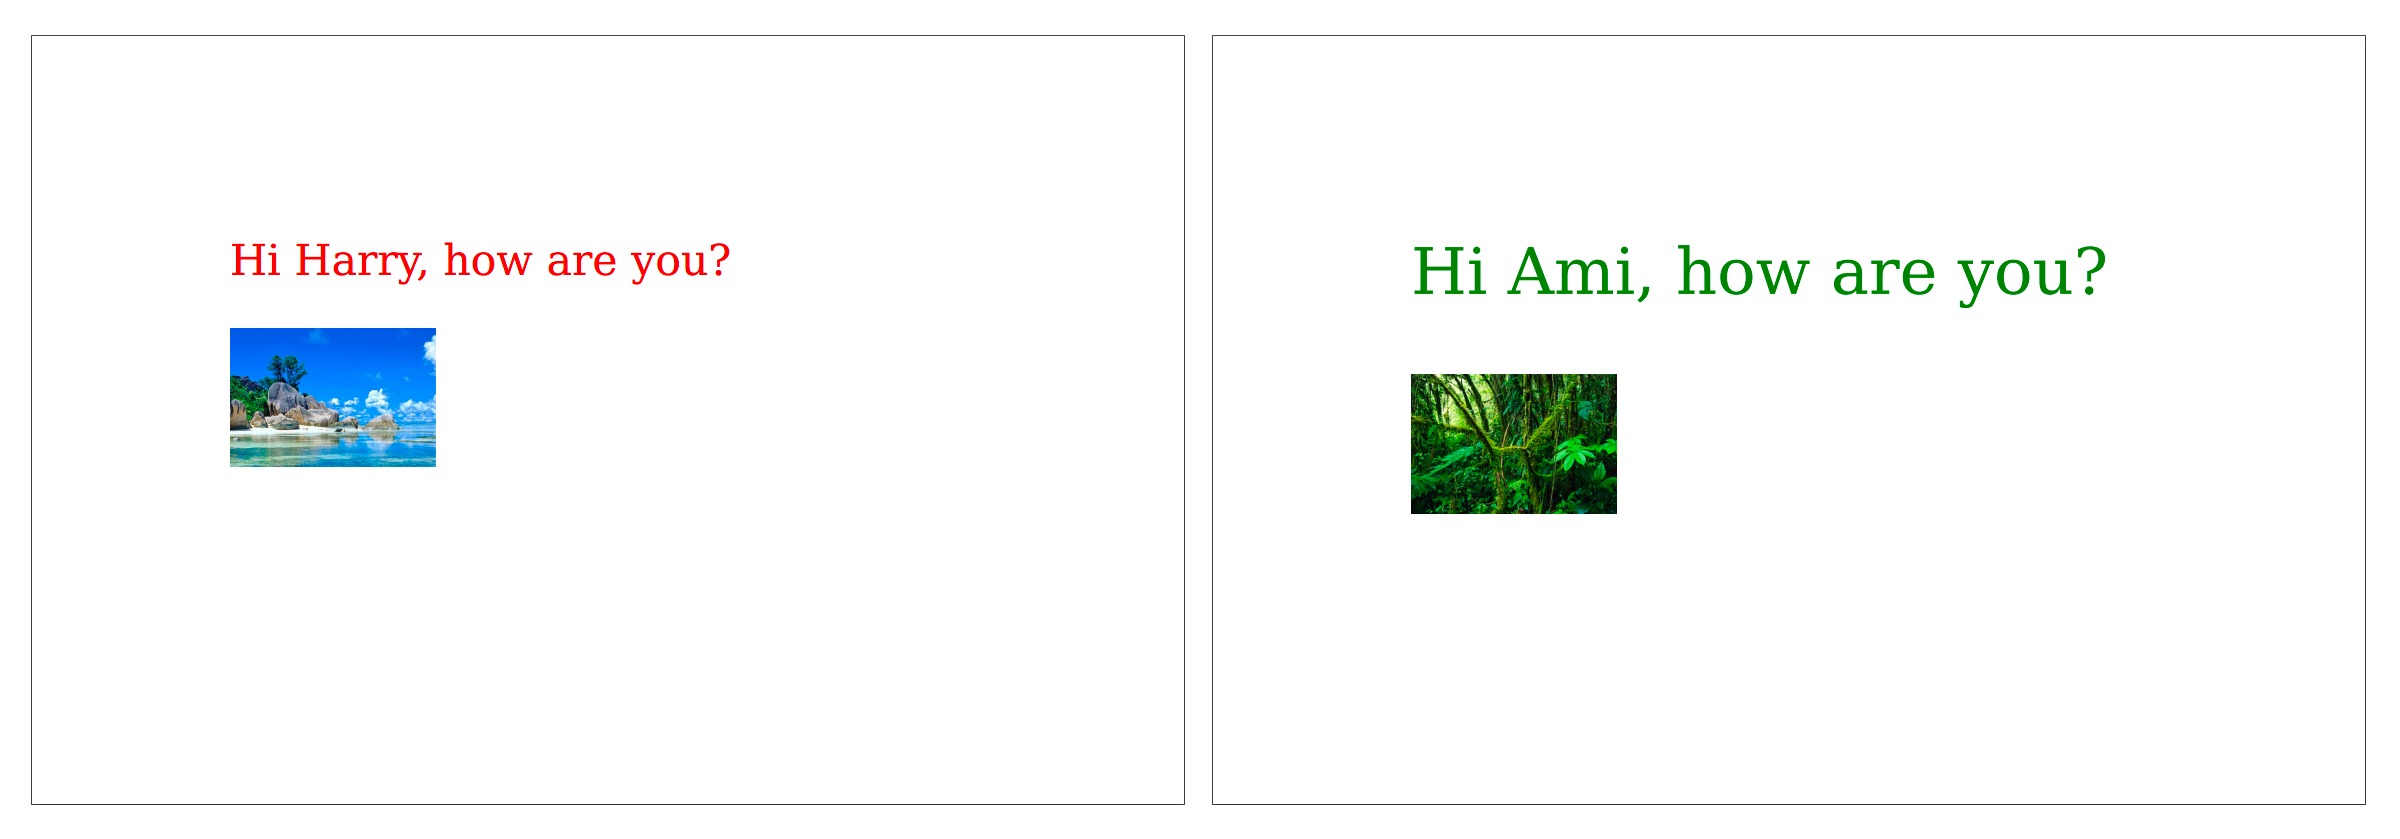
<html style="padding: 1in; font-size: {{fontsize}}; color: {{color}}">
  <p>Hi {{name}}, how are you?</p>
  <img src="{{img}}" style="width: 1in">
</html>
If the HTML above were used with the information below:
| name | fontsize | color | img |
|---|---|---|---|
| Harry | 20px | red | https://s3-us-west-2.amazonaws.com/public.lob.com/assets/beach.jpg |
| Ami | 30px | green | https://s3-us-west-2.amazonaws.com/public.lob.com/assets/jungle.jpg |
Then the final two postcards would be rendered like so:
Use this feature to your advantage to create completely custom postcards, self-mailers, letters, and checks for your recipients, without having to generate PDFs on your side.
Objects
NOTE: This is only available on the 2020-02-11 and later API versions.
You have the ability to access merge variables at any depth within your JSON. For instance, you can have an object created with multiple attributes:
{
  "user": {
    "name": "Ami",
    "location": "San Francisco"
  }
}
To access these within your template you can do the following:
Name is: {{user.name}}
Location is: {{user.location}}
This renders the following template:
Name is: Ami
Location is: San Francisco
You can also create a "section" which will change the context of the variables you are accessing. For instance:
{{#user}}
  Name is: {{name}}
  Location is: {{location}}
{{/user}}
This renders the same HTML as above, since you changed the context to the "user" temporarily. This is done by the {{#user}} and {{/user}} syntax. Everything inside that "section" tries to access a property on the "user" object.
Conditionals
NOTE: This is only available on the 2020-02-11 and later API versions.
Conditionals allow you to conditionally render content in a mail piece. An example use case could be including additional text for any user who has purchased over 1,000 products. To do that would require the following:
Merge variables:
{
  "bought_a_lot": true
}
Template:
<html>
{{#bought_a_lot}}
Thank you for being a loyal customer!
{{/bought_a_lot}}
</html>
This renders:
Thank you for being a loyal customer!
If you want to render content if a condition does not pass, simply use ^: {{^condition}}{{/condition}}.
For example:
Merge variables:
{
  "bought_a_lot": false
}
Template:
<html>
{{^bought_a_lot}}
Buy more products!
{{/bought_a_lot}}
</html>
Buy more products!
Loops
NOTE: This is only available on the 2020-02-11 and later API versions.
Loops allow you to display content multiple times for multiple objects. The following is an example of how to use loops:
Merge variables:
{
  "users": [{"name": "Nathan"}, {"name": "Ami"}]
}
Template:
<html>
  List of top users:
  <ul>
  {{#users}}
    <li>{{name}}</li>
  {{/users}}
  </ul>
</html>
This renders:
<html>
  List of top users:
  <ul>
    <li>Nathan</li>
    <li>Ami</li>
  </ul>
</html>
Merge variable strictness setting
Lob offers a merge variable strictness setting that dictates how we treat merge variables in your HTML template. This account setting affects the POST /v1/postcards, POST /v1/self_mailers, POST /v1/letters, and POST /v1/checks endpoints in both Test and Live mode:
- Strict: Lob will send a 422 error if you define a merge variable in your HTML that is not passed in the merge_variables field of that request. Pass '' or null to have a particular defined variable not render.
- Relaxed: Lob will not send an error if you define a merge variable in your HTML that is not included in the merge_variables field of that request. Instead, we will simply render nothing in the HTML in place of that merge variable.
Regardless of your strictness setting, if you pass merge variables keys that are not defined in your HTML, no error will be thrown. Your HTML will simply be rendered as normal without substituting the extra variable(s).
NOTE: On the 2020-02-11 and later API versions which support JSON in merge variables, merge variable strictness will still apply to the nested object keys, i.e. if a nested merge variable is undefined on the strict setting, then Lob will send an error.
Using HTML and fonts
You can incorporate any font into your Lob HTML Templates. Lob natively supports only one font family, Deja Vu, within our renderer. However you can access other fonts by using one of the options below.
Using Google web fonts
Using Google Web Fonts is a simple way to import and use a wide variety of fonts within your Lob HTML without having to download or upload any assets.
Once you've identified your font within Google, just include a link to the font in the <head></head> tag of your HTML:
<head>
  <link href="https://fonts.googleapis.com/css?family=Roboto" rel="stylesheet">
</head>
Then reference the font in your <style></style> tag or inline:
body {
  font-family: 'Roboto';
}
Using custom fonts
You are also free to use any custom font that is accessibly hosted. Upload your font files to a performant file hosting platform (such as Amazon S3) and use CSS @font-face declaration to load them into your design.
For example, in the <style></style> tag of your HTML, add the rule like so:
@font-face {
  font-family: 'My Font Name';
  font-style: normal;
  src: url('https://link-to-your-font/my_font_name.ttf') format('truetype');
}
And then reference the font in your <style></style> tag or inline:
body {
  font-family: 'My Font Name';
}
Page breaks in HTML
When creating HTML letters within Lob, you may find it necessary to create page breaks in order to split up your content by page. This is easy to do using CSS's page-break-after property.
For example, create a page class in your HTML and apply these styles:
.page {
  page-break-after: always;
  position: relative;
  width: 8.5in;
  height: 11in;
}
And then, divide the pages of content in your HTML by this page class:
<div class="page">
  Page 1
</div>
<div class="page">
  Page 2
</div>
Template storage
Templates can be viewed in the Lob dashboard, where they can be created, managed, and stored.
The total number of templates available is dependent on the Platform Edition; if you need more HTML templates than what is available in your current edition of Lob, we encourage you to upgrade to a higher tier edition. You may also delete any HTML templates you no longer need to make room for new ones.
General template best practices
Although anyone versed in HTML/CSS will find the process of creating templates familiar, we recommend these practices.
If you need a place to start, we highly recommend forking off an example from our Template Gallery. For the closest visual analog to our own rendering technology, we suggest viewing your template in the Safari browser. This also means that usage of CSS stylings unsupported by the Webkit (Safari) engine may not render correctly. We recommend working at a 300dpi resolution, any higher resolution would be lost once the mail piece is printed.
See it before you ink it!
Be sure to make use of the "Preview" option with your HTML templates, whether in Live or in Test mode, to get a digital proof of your mail piece. Be sure to keep in mind that templates created in the Test Environment will need to be recreated in the Live Environment before they can be used with Live mail pieces.
A note on Javascript usage
While JavaScript can unlock all kinds of new functionality in your Lob templates, it comes with the important caveat that not all client-side JavaScript can be rendered by Lob. You are thus strongly encouraged to test all JavaScript prior to utilizing in live mail templates. Test your entire HTML template containing the JavaScript (rather than just the JavaScript snippet itself) using your Test API key before using the template in any live mail API requests.
Avoid the following practices
For a successful template creation experience, abstain from the following:
- using the object-set property
- images img with opacity properties
- images using background-image, border-radius, and border properties in unison
- gradients using transparency
-
background-size: contain
- in these cases, also include background-repeat: no-repeat;
- JPEG images with EXIF orientations set to non-zero values; workarounds include:
- using a JPEG header manipulation utility such as jhead to correct the rotation value
- Example: jhead -autorot myfile.jpg
- using a PNG instead
- using a JPEG header manipulation utility such as jhead to correct the rotation value