Launching your first campaign
Table of Contents
Lob enables you to increase your direct mail ROI by easily launching, testing, and analyzing campaigns. This guide will walk you through how to launch your first campaign, straight from your dashboard.
Send campaigns in the dashboard
Let's get started! First, make sure you have the following on hand:
- Campaign send strategy
- Audience file (.csv format)
- Creative asset (front & back designs), as a PDF or in a saved HTML template
Next, head on over to the new Campaigns tab in your dashboard:
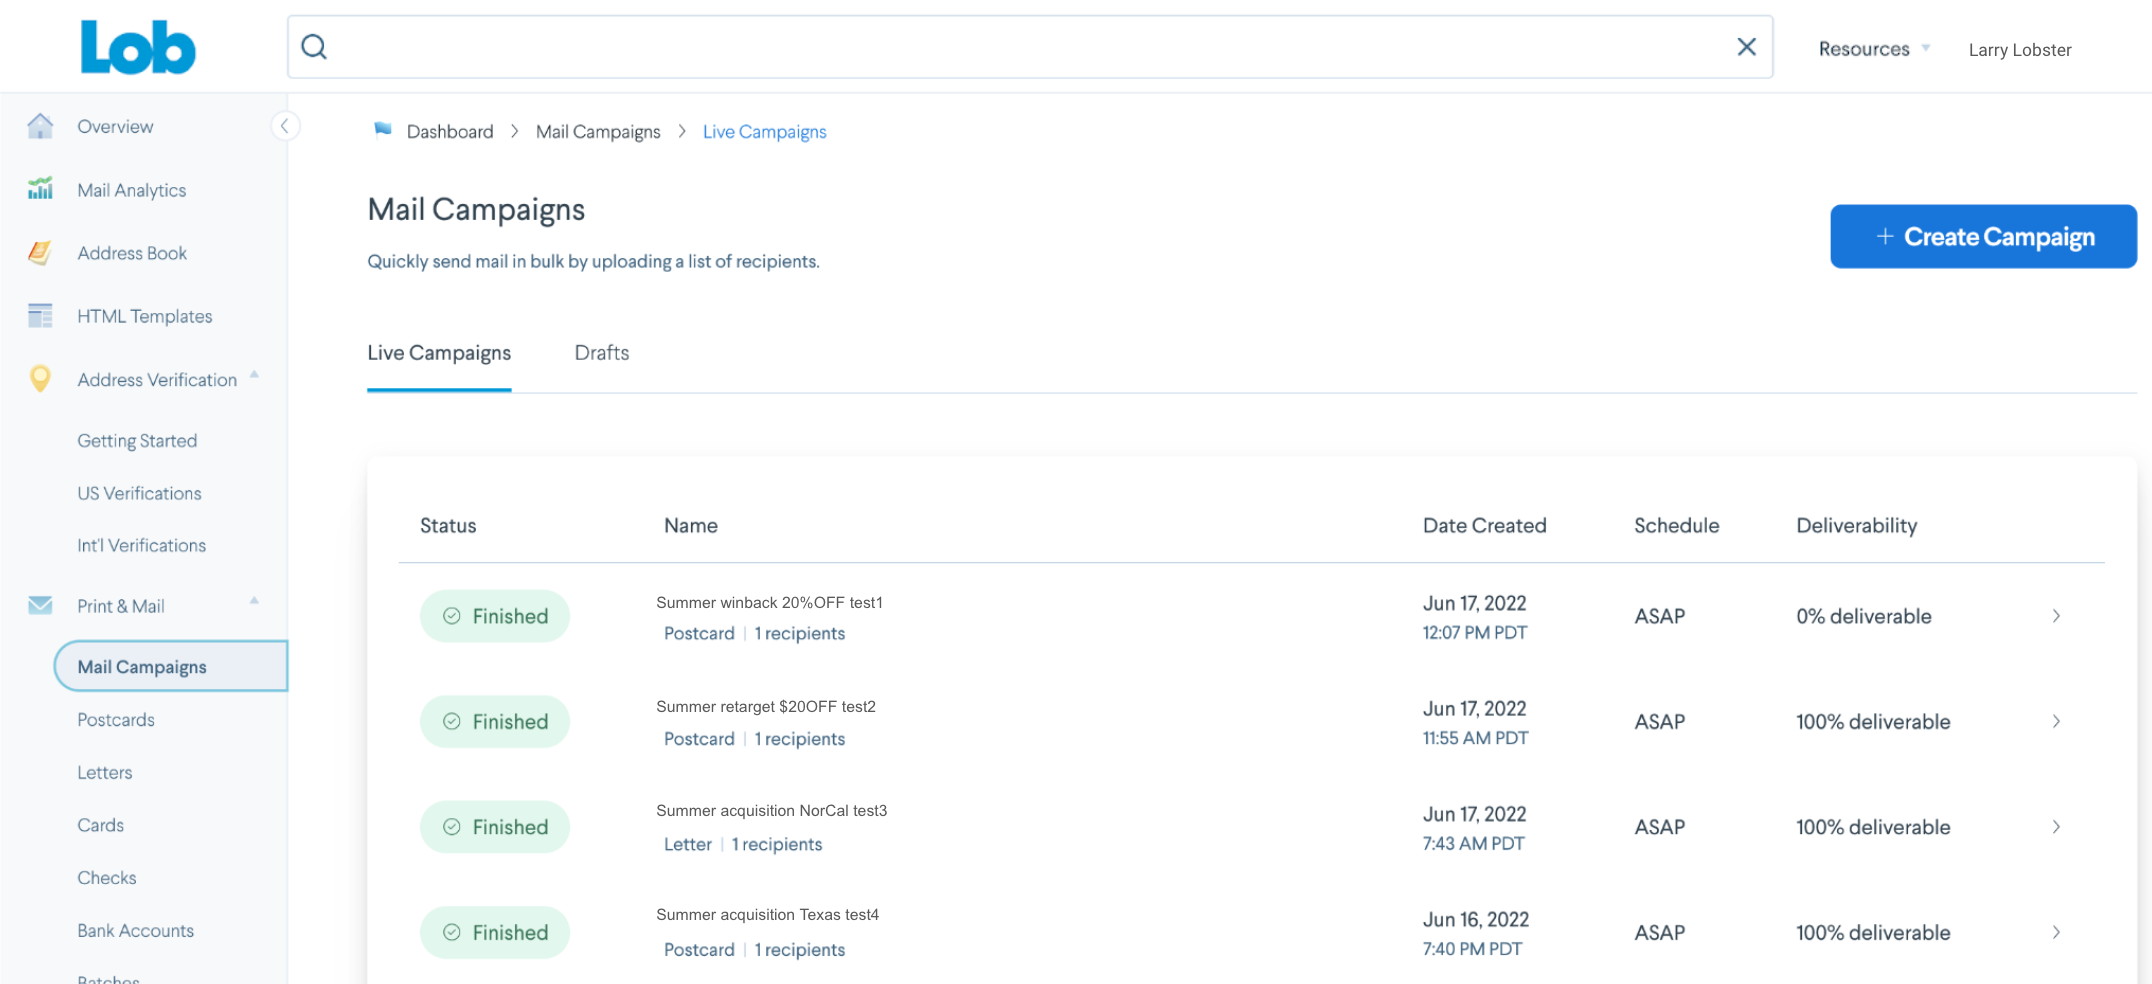
- Create a new campaign: Click the big blue button at the top right of your screen
- Add campaign name: To begin, give your campaign a unique name and description to reference in the future. Give it a name that is distinguishable and easily identified when you have numerous campaigns in your dashboard
Step 1: Configure your campaign settings
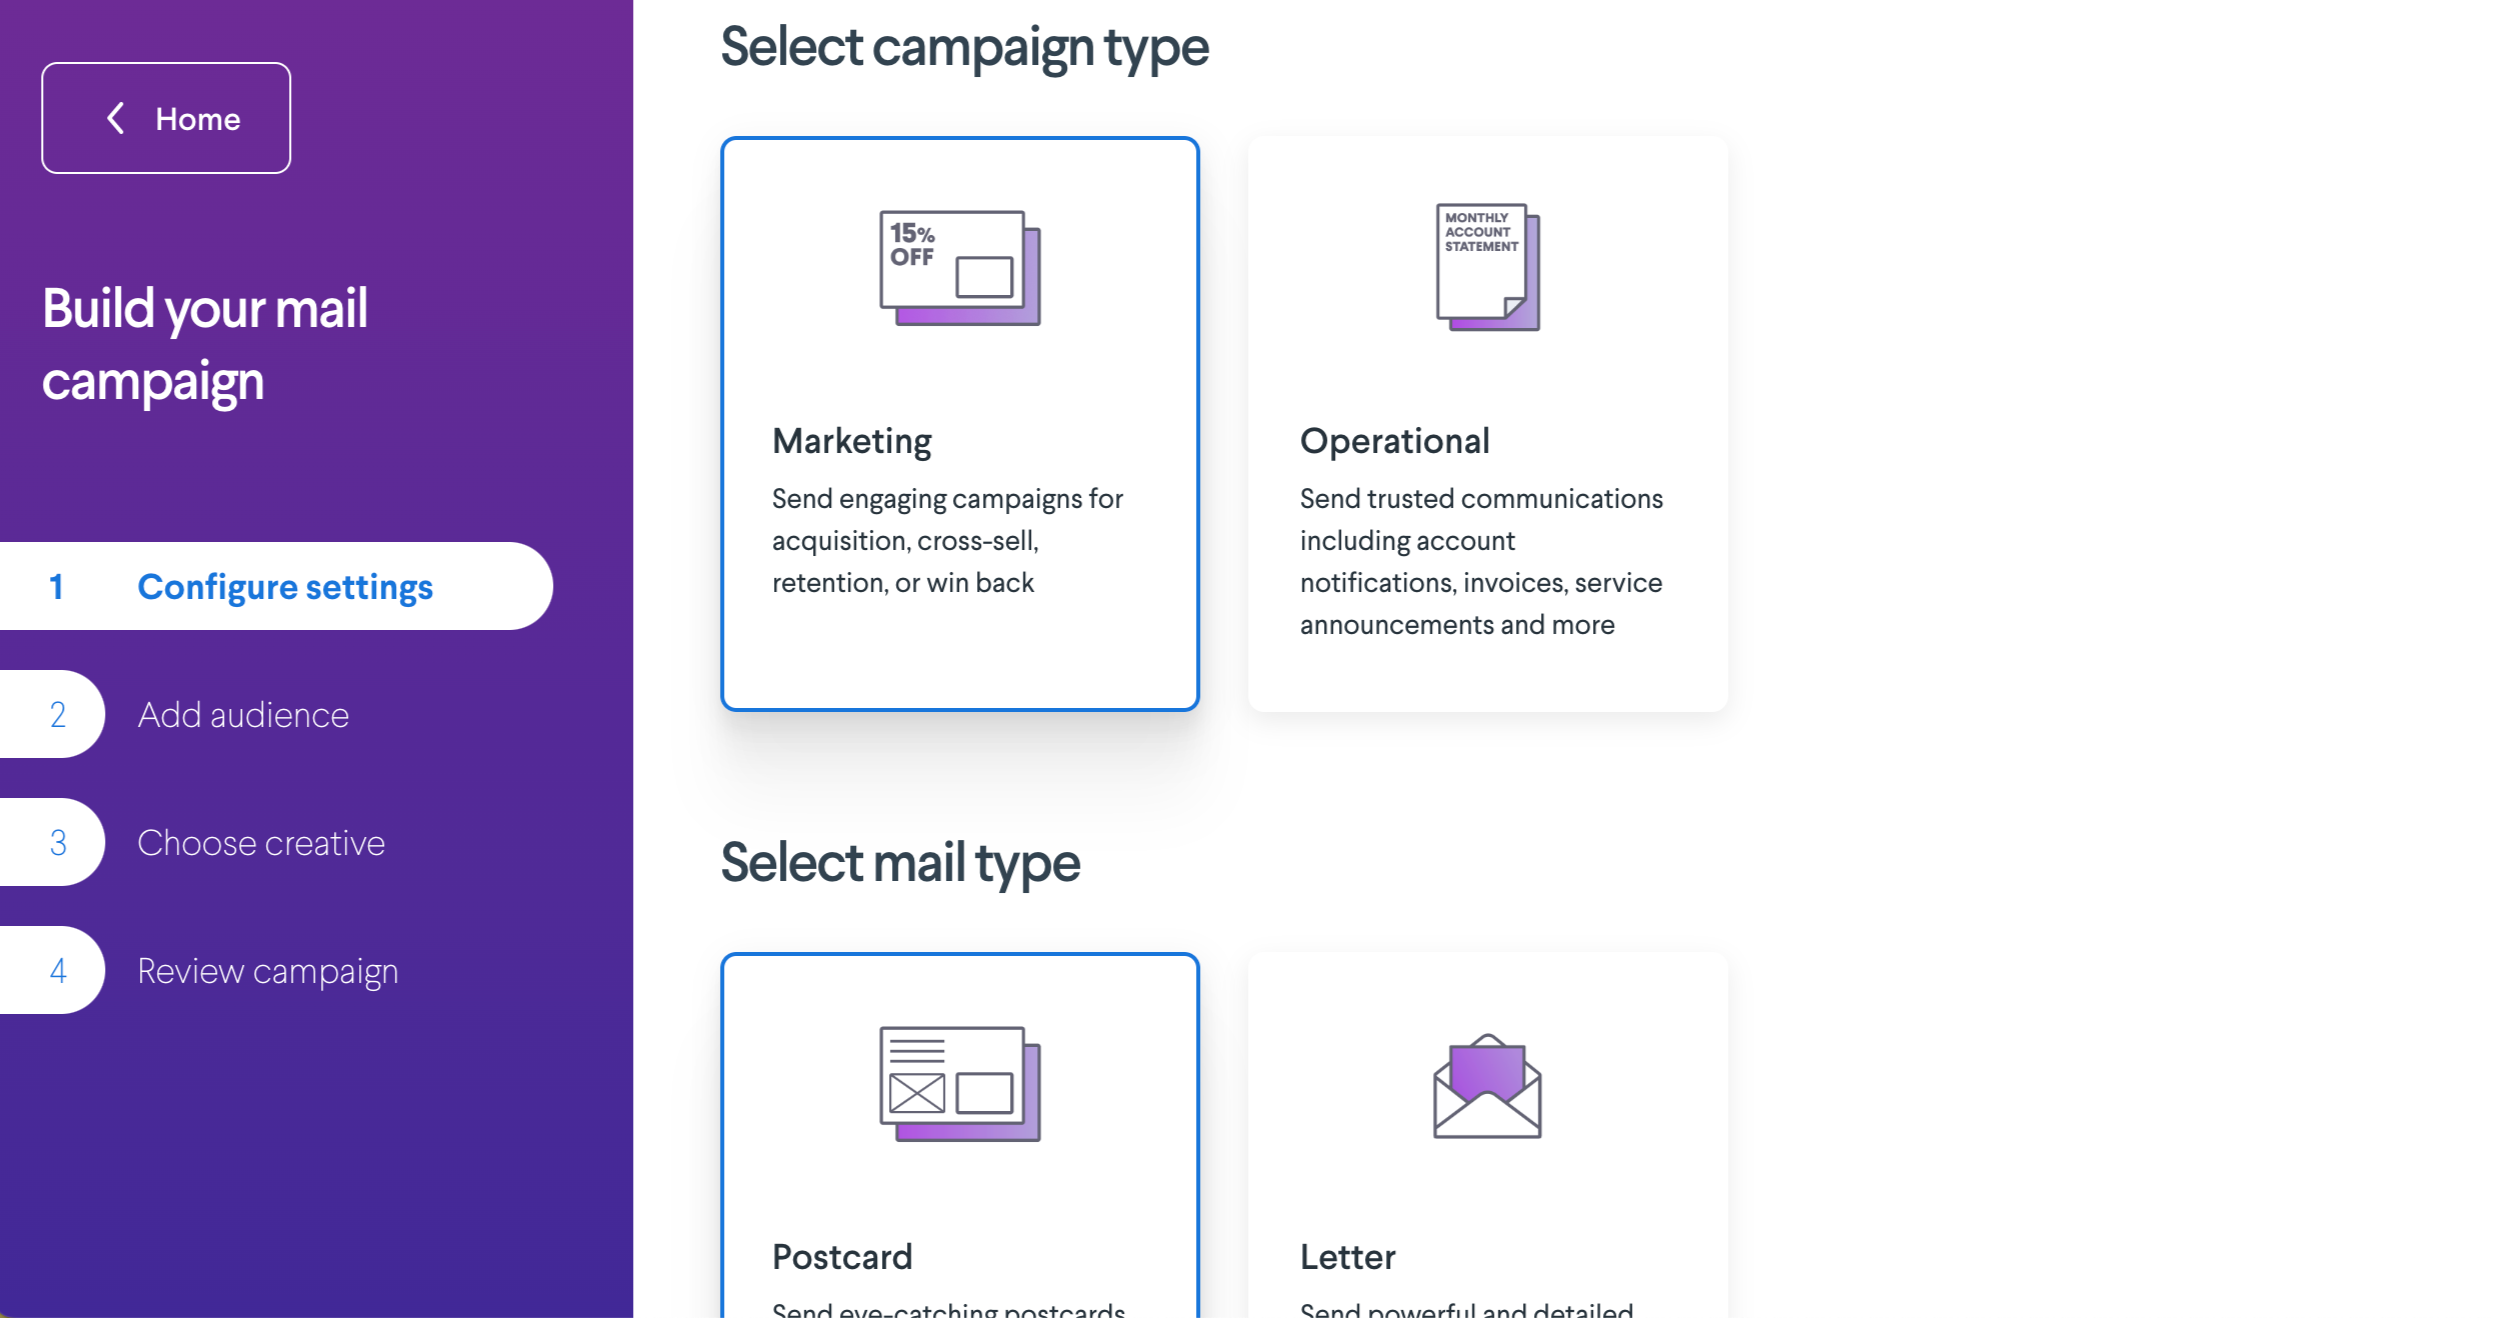
- Select campaign type: Select what type of campaign this is: are you sending out a marketing campaign or using this for operational purposes?
- Select mail type & settings: Select what mail type and size you’ll be sending. Currently, you can choose from high-quality postcards or letters sealed inside envelopes
-
Postage preferences:
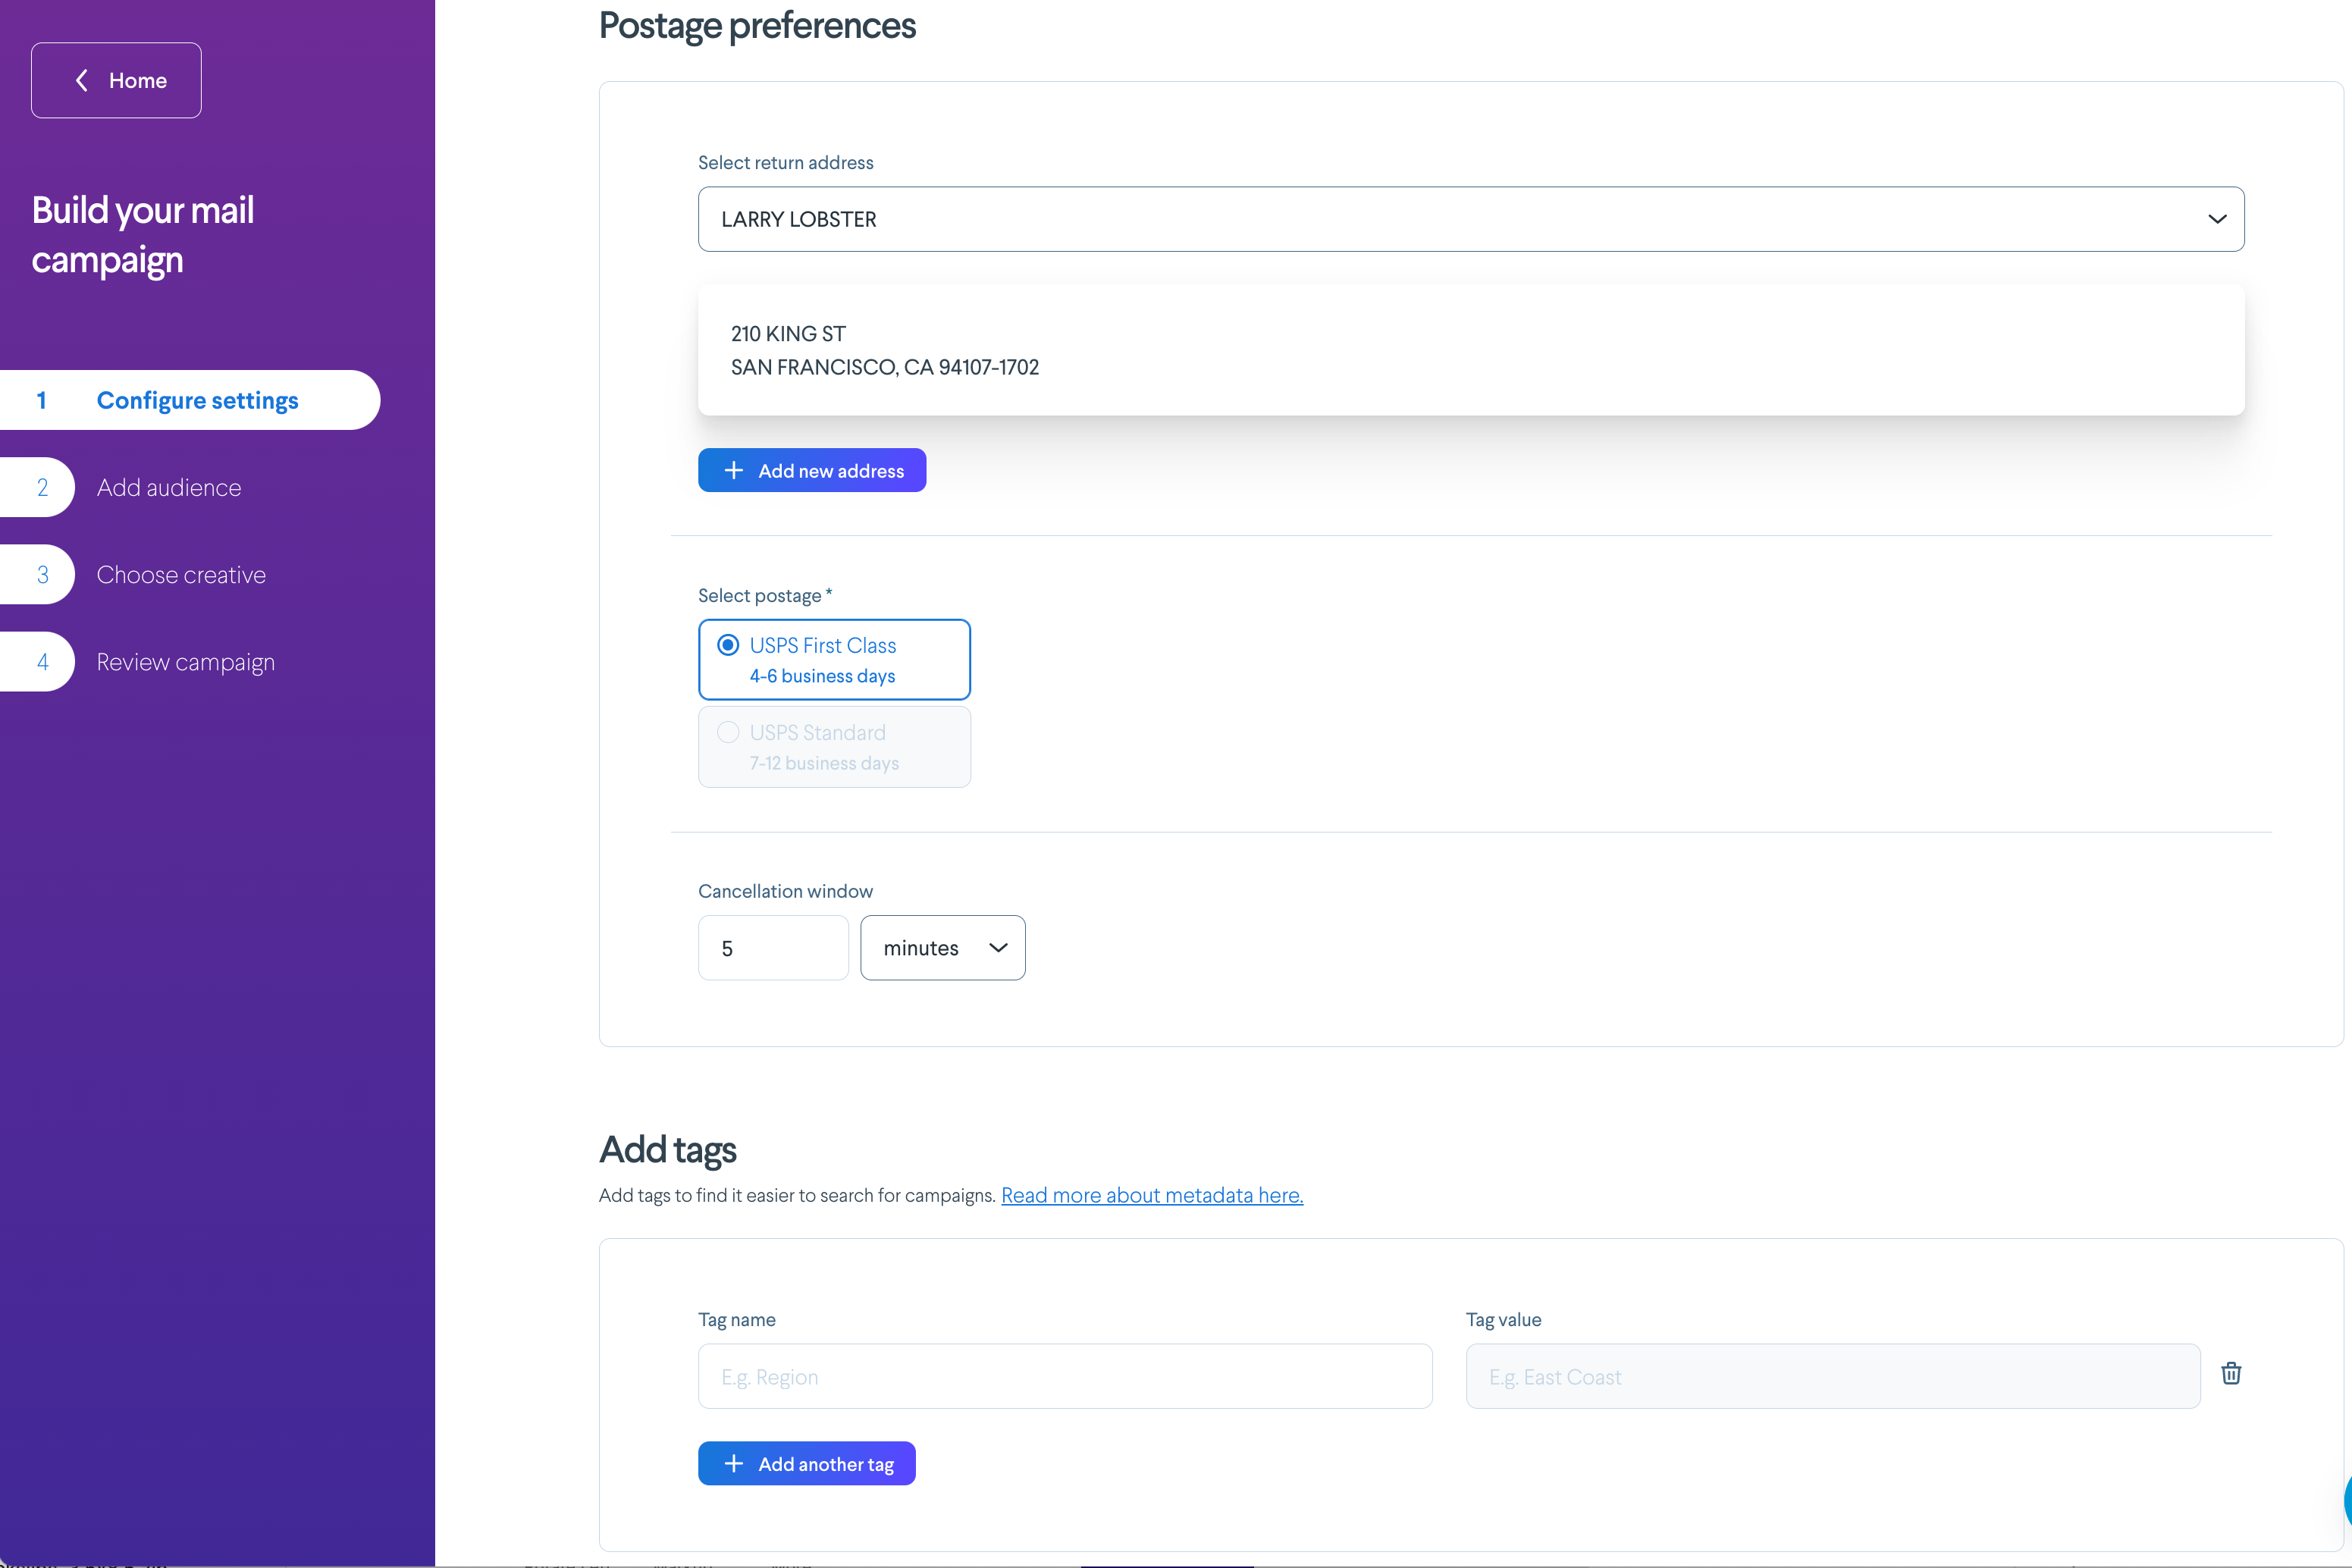
- Add the return address you’d like to appear on the mailpiece
- Select the postage and mailing class that you’d like to apply to your campaign; note this will have pricing implications
- Select an amount of time for your campaign cancellation window, which is the amount of time you are allowed to quickly edit and QA your mailings after submission, but before they are sent to print production
- Add tags: Add any custom metadata tags you'd like to apply to your campaign. Tags enable you to easily filter and sort your campaigns for future reporting
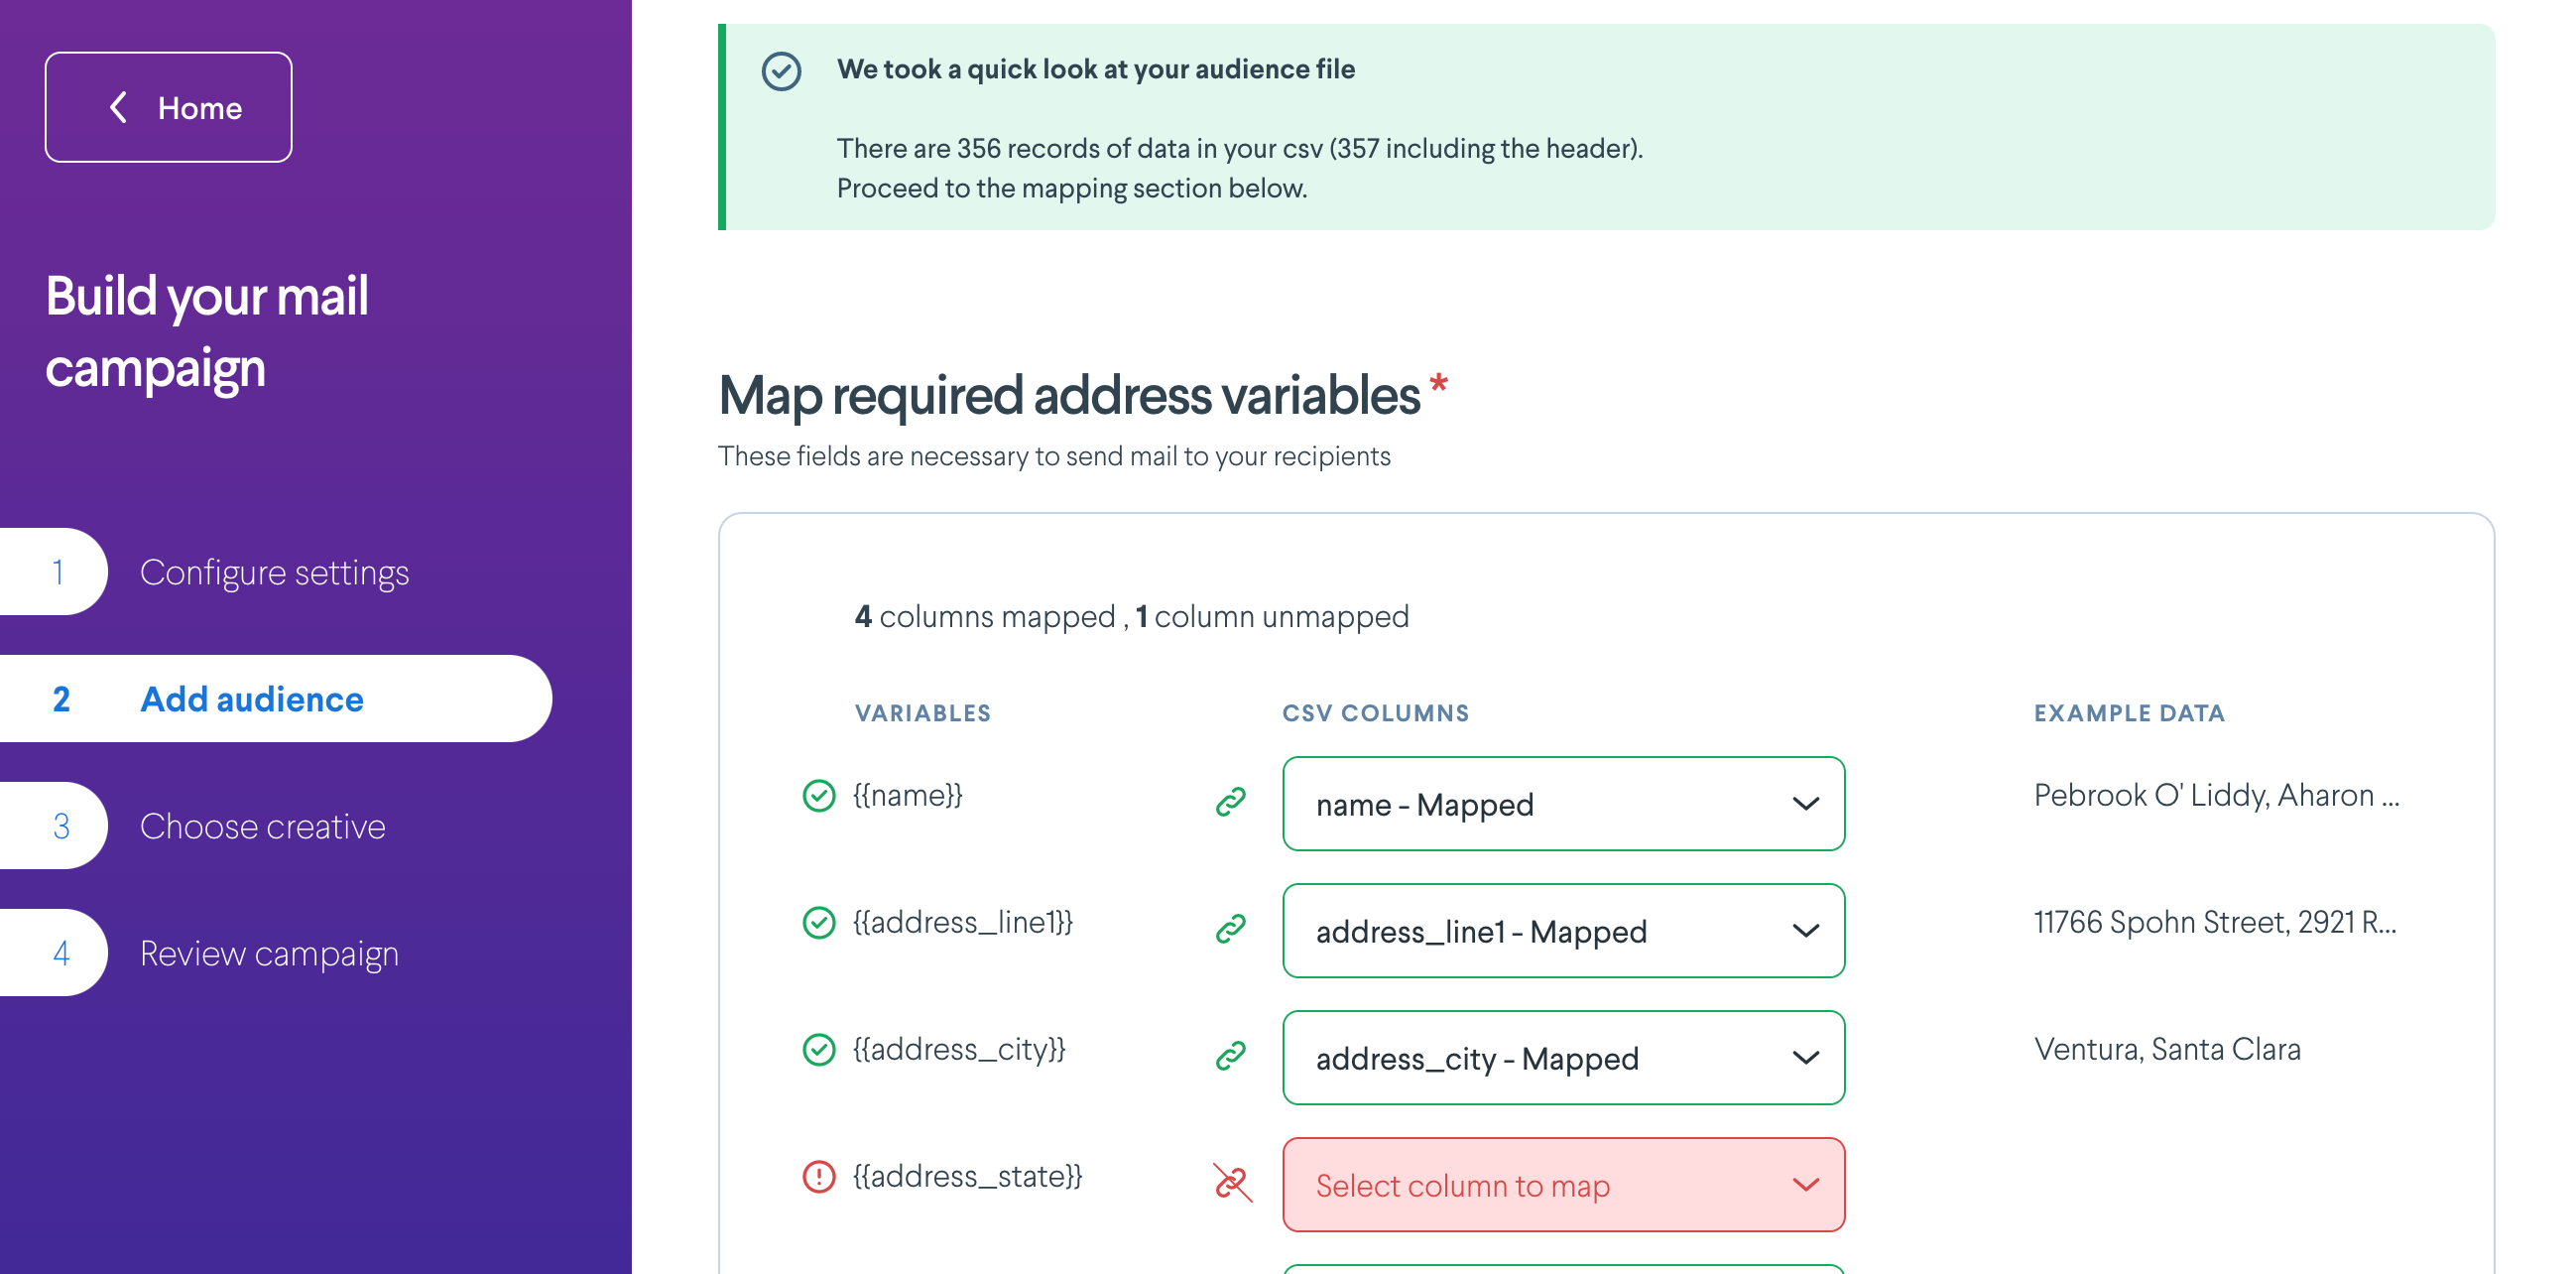
Step 2: Add target audience
- Add audience: select your segment via CSV
-
Review address fields: Lob automatically maps, and formats your address to meet USPS requirements, but you can review and adjust the mapping if necessary
Step 3: Compose campaign creative assets
- Upload your creative assets
Step 4: Finalize and review your campaign details
- Campaign settings: Review the campaign send details
- Target audience: Review the audience list
-
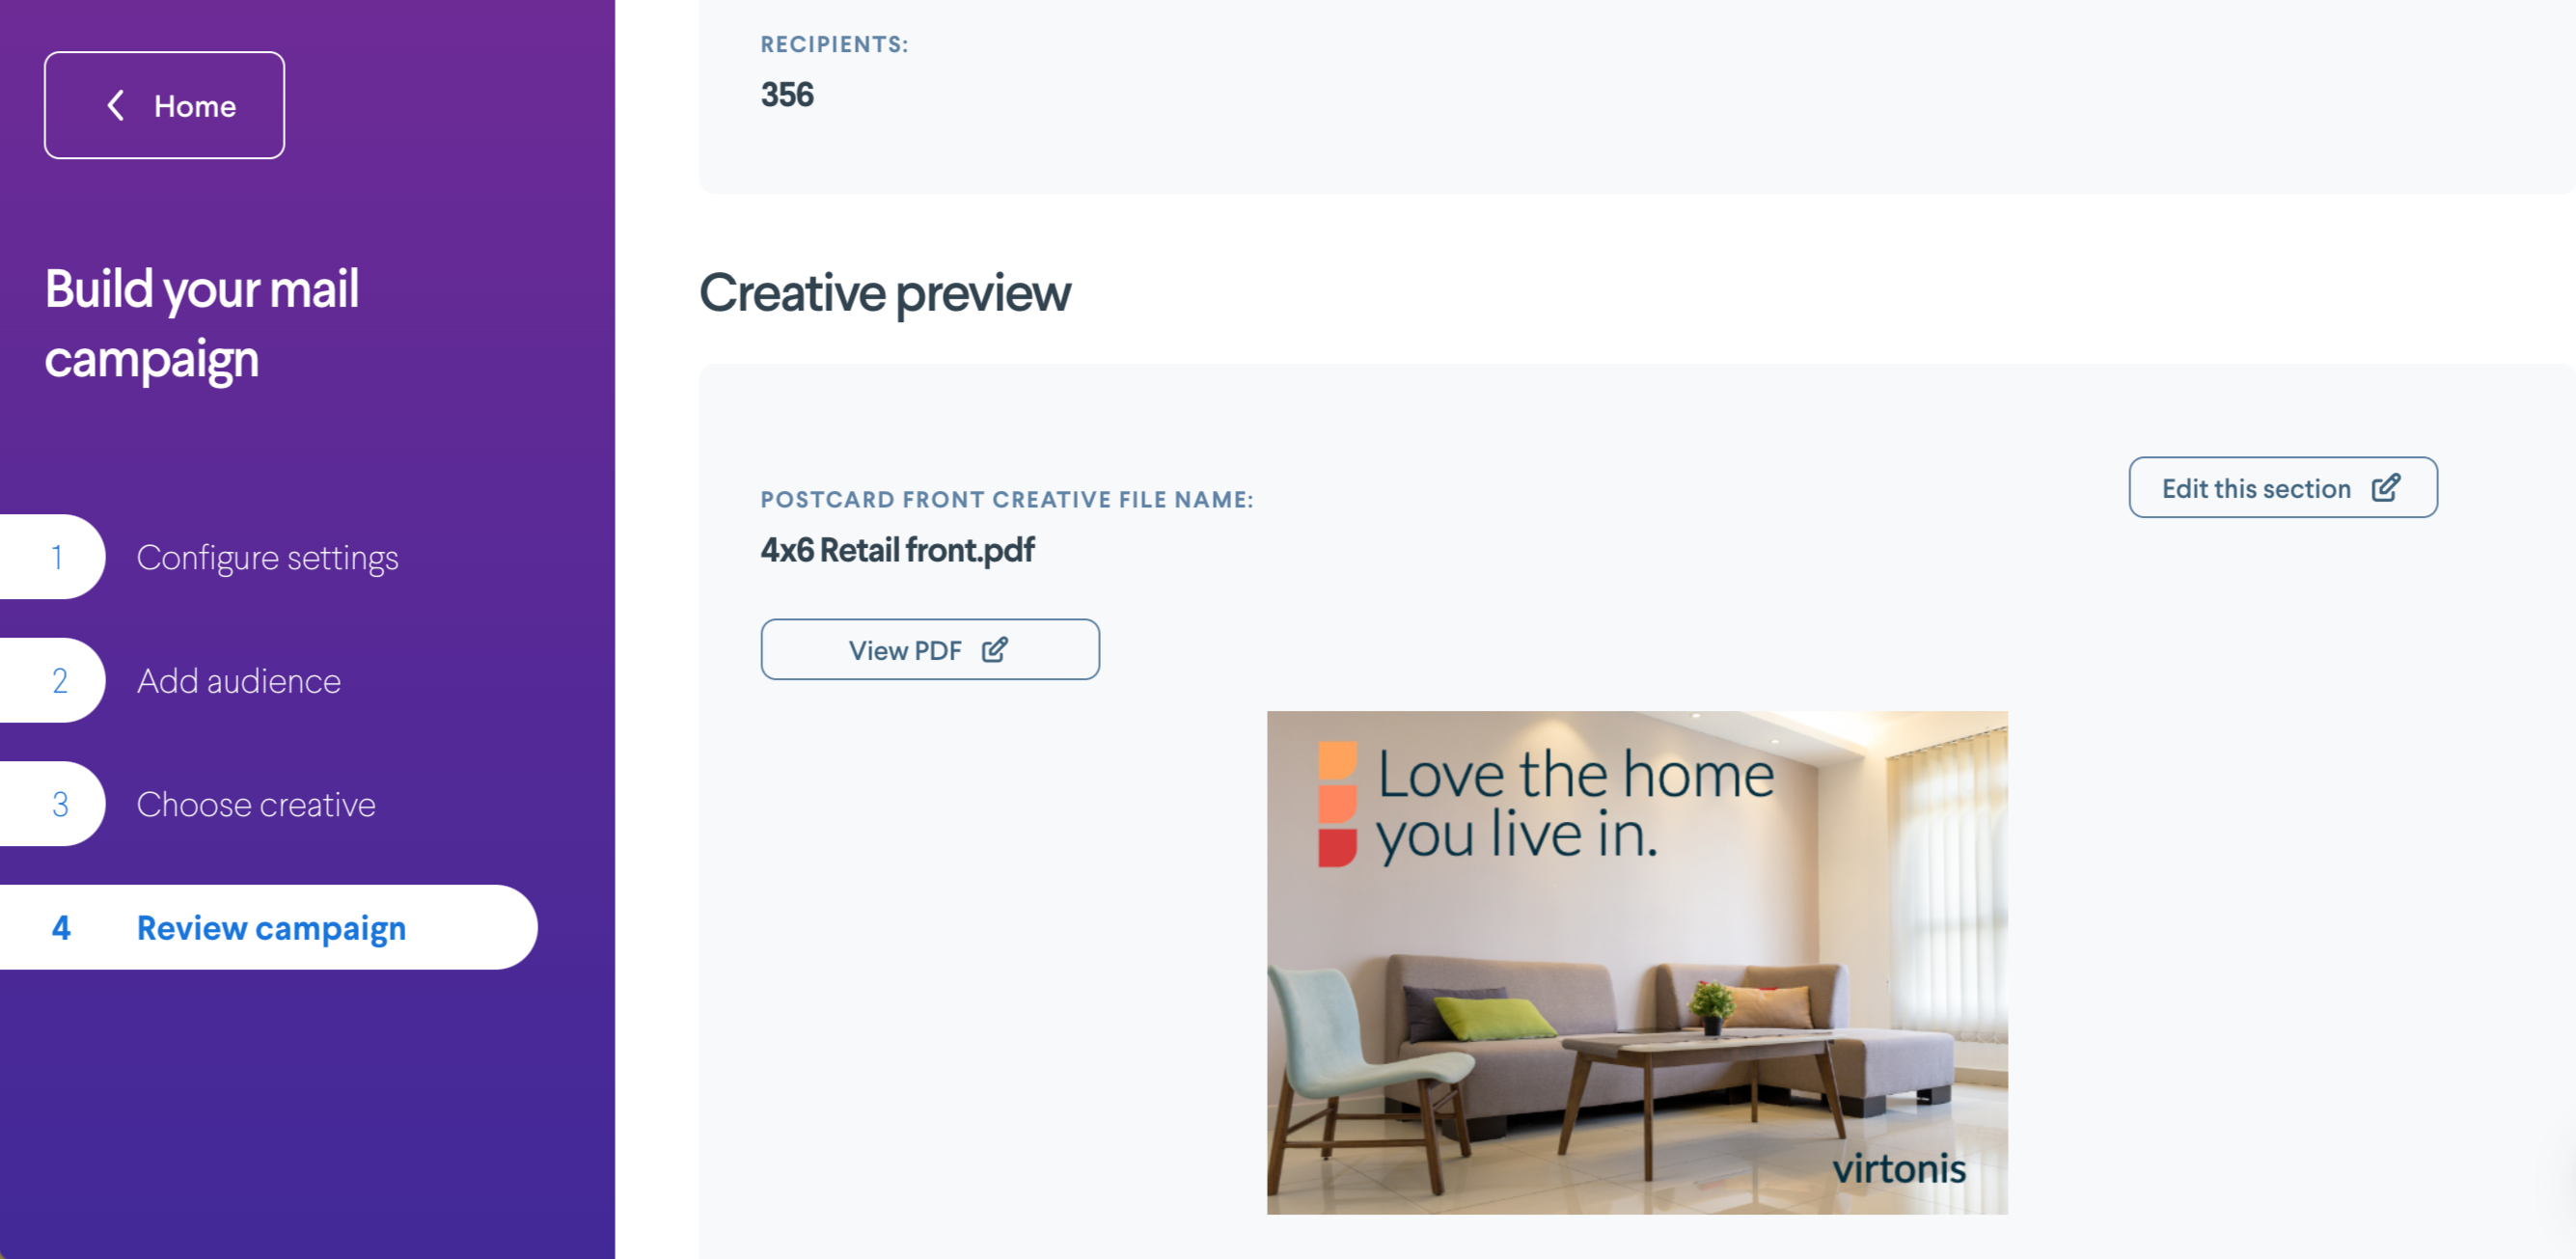
Creative preview: Preview the assets for your campaign to ensure they are rendering correctly
Submit! Once your campaign is submitted it will be sent to the printer in the submission window selected before being dropped to USPS for delivery. You can track the progress of your campaign in your Campaigns dashboard, or in the Mail Analytics tab if you are an Enterprise edition customer.
Send campaigns via the API
Want to send your large-scale campaign sends more programmatically through the API? Well, now you can, too!
When creating campaigns, you’ll interact with 3 main models: campaigns, creatives, and uploads.
- The campaigns model is used to set up high-level information about your campaign
- The creatives model is used for uploading artwork and artwork settings for your campaign
- The uploads model is used to build your audience and configure any recipient-level details for your campaign
Follow the steps below to create your first campaign in the API.
Step 1: Create your campaign
Endpoint: POST api.lob.com/v1/campaigns
Documentation: Create Campaign
First, create your campaign. At a minimum, your campaign needs a name and a schedule_type.
{
    "name": "Demo Campaign",
    "schedule_type": "immediate"
}
Step 2: Add creative
Endpoint: POST api.lob.com/v1/creatives
Documentation: Create Creatives
The next step is to create your creative object that will be associated with the campaign. You can only associate a single creative with a campaign. You are required to add a campaign_id, resource_type, and any requirements for your selected resource_type. If sending a letter, you will also need a “from” address.
{
    "campaign_id": "campaign_id",
    "resource_type": "postcard",
    "front": "{{pdf}}",
    "back": "{{pdf}}",
    "details[size]": "4x6",
    "details[mail_type]": "usps_standard_class"
}
Step 3: Create your upload object
Endpoint: POST api.lob.com/v1/uploads
Documentation: Create Upload
Creating your audience, or “upload”, is the next step. This can be done prior to Step 2 as well. For more information on how to best structure your upload for Steps 3 and 4, visit our campaign audience guide.
{
    "campaignId": "{{campaign_id}}",
    "requiredAddressColumnMapping": {
        "name": "recipient",
        "address_line1": "primary line",
        "address_zip": "zip_code",
        "address_state": "state",
        "address_city": "city"
    }
}
Step 4: Upload your file
Endpoint: POST api.lob.com/v1/uploads/{{upload_id}}/file
Documentation: Upload File
After creating your upload object, you can now upload your file as a byte stream (binary file).
{
    "file": "{{file.csv}}"
}
Step 5: Execute your campaign
Endpoint: POST api.lob.com/v1/campaigns/{{campaign_id}}/send
Documentation: Send Campaign
Finally, you can execute your campaign! To see the status of your mail pieces as they are created, use the GET api.lob.com/v1/uploads/{{upload_id}} endpoint.
{
   "is_draft": "false"
}
Step 6: Export failures
Endpoint: POST api.lob.com/v1/uploads/{{upload_id}}/exports
Documentation: Create Export
First, let us know that you would like to create a failure export. Your response will include an export ID, which will be used to retrieve the export URL in the next step.
{
   "type": "failures"
}
Endpoint: GET api.lob.com/v1/uploads/{{upload_id}}/exports/{{export_id}}
Documentation: Retrieve Export
You can then retrieve the S3 URL of the export from the GET response above. Your export will include row-level details on why each record failed.
Step 7: Cancel your campaign
Endpoint: DELETE api.lob.com/v1/campaigns
Documentation: Delete Campaign
As long as your campaign cancellation window has not passed, you can cancel your campaign using our DELETE route on the campaigns endpoint.
And that's it! If you have any questions, feel free to reach out to your Customer Success Manager, or to support@lob.com.